
Preparing for Migration
We will discuss the process of migrating an Amazon EC2 instance to Ubuntu 22.04 with an 8 GB network disk and a public IPv4 address.
1. Make sure that AWS instance has a root password and you know it. If you can’t connect to the instance using SSH key, you can restore access in the control panel.
2. If Cloud-Init is not installed on the instance, install it as follows:
apt update
apt install cloud-init
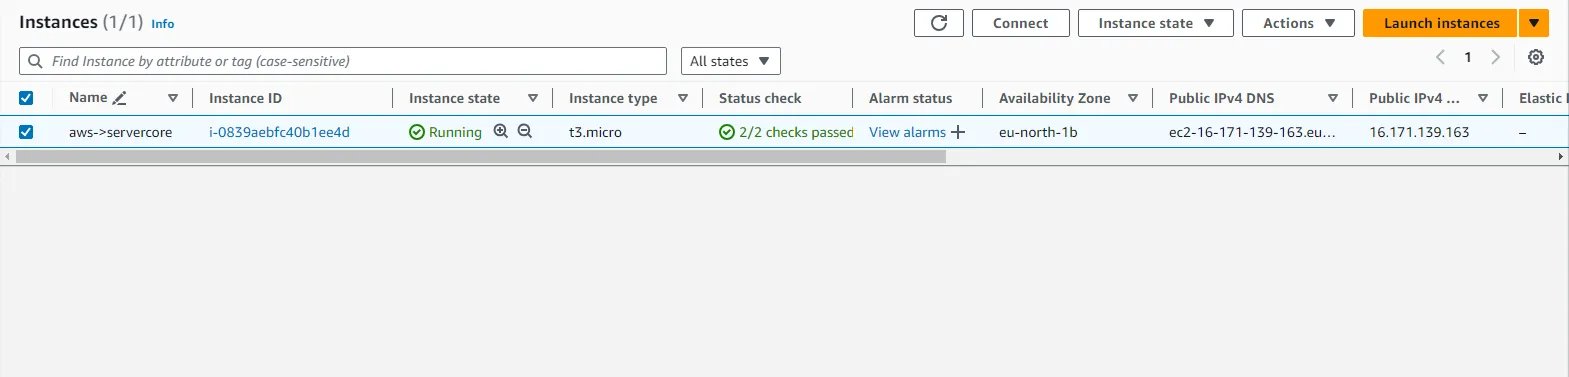
Creating an Instance Image
Open the control panel, select the desired entry from the list of instances, and create its image. To do this, click Actions and use the menu to select Image and templates ⟶ Create Image:
We recommend that you avoid using No reboot option when creating an image, as any attempt to create an image without stopping the instance may result in data inconsistency and other issues. Note that the instance will be restarted while the image is being created:
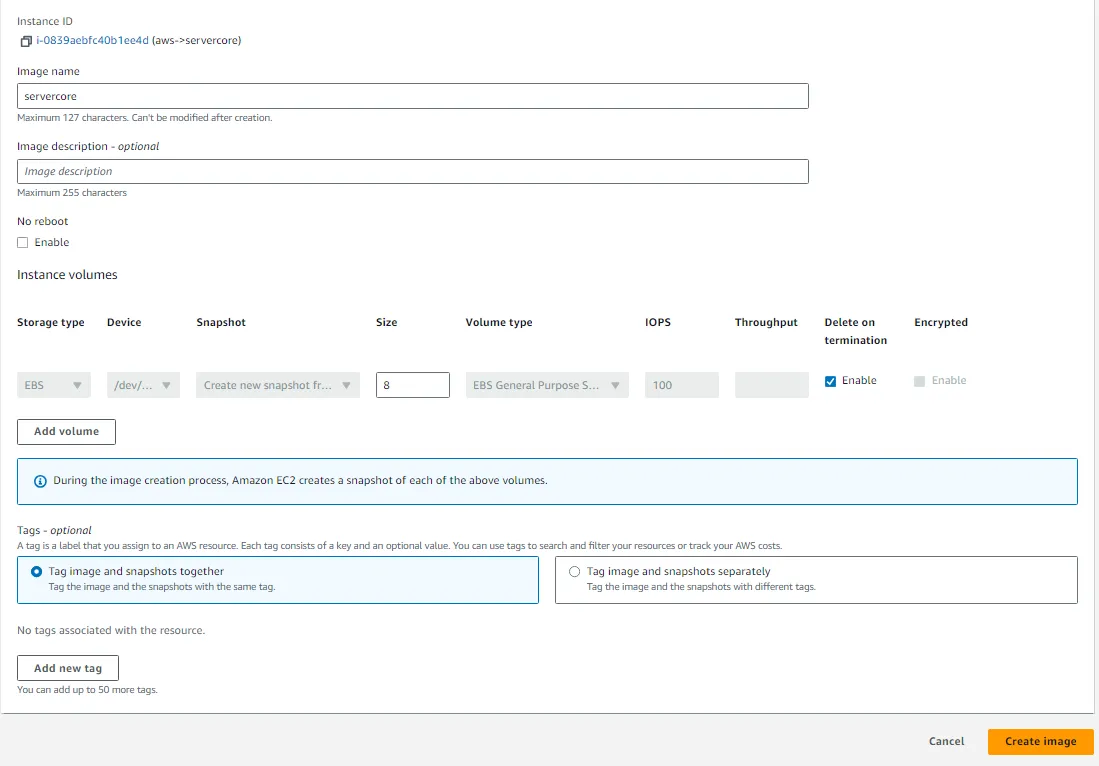
The created image will be hosted in the section of Amazon Machine Images (AMIs). Wait until the process is complete and the image status becomes Available.
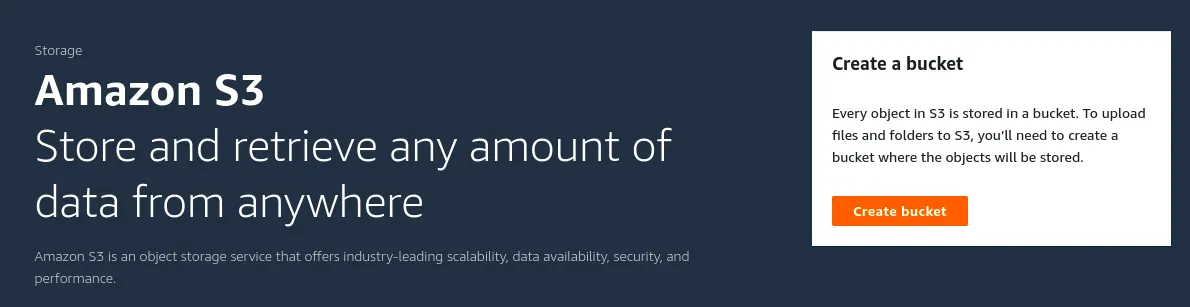
Creating an S3 Bucket
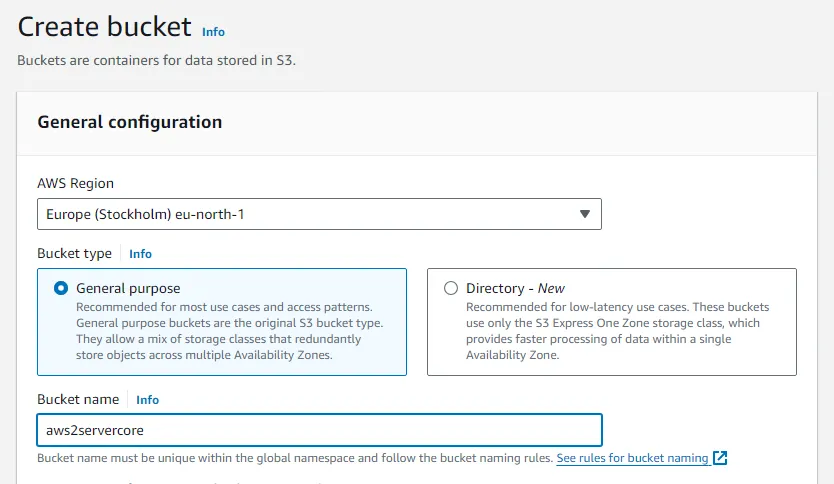
Create a container in Amazon S3 storage to host the instance image.
When you create a container, select the region to host the instance and its image. You can use the default values for other settings:
Managing Access Level through AWS IAM
To continue using the image, configure access to resources through AWS IAM.
1. Open the IAM service.
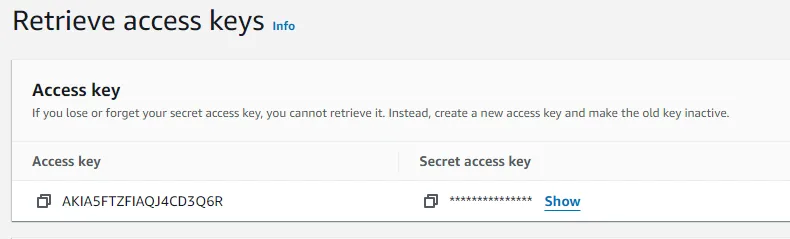
2. Create Access keys for using AWS CLI. To do this, go to Users ⟶ Your user ⟶ Security credentials and click Create Access keys. Make sure to save the ‘.csv’ file or copy the Secret access key. If you loose it, you will have to create a new access key and make the current one inactive.
Creating a Service Role
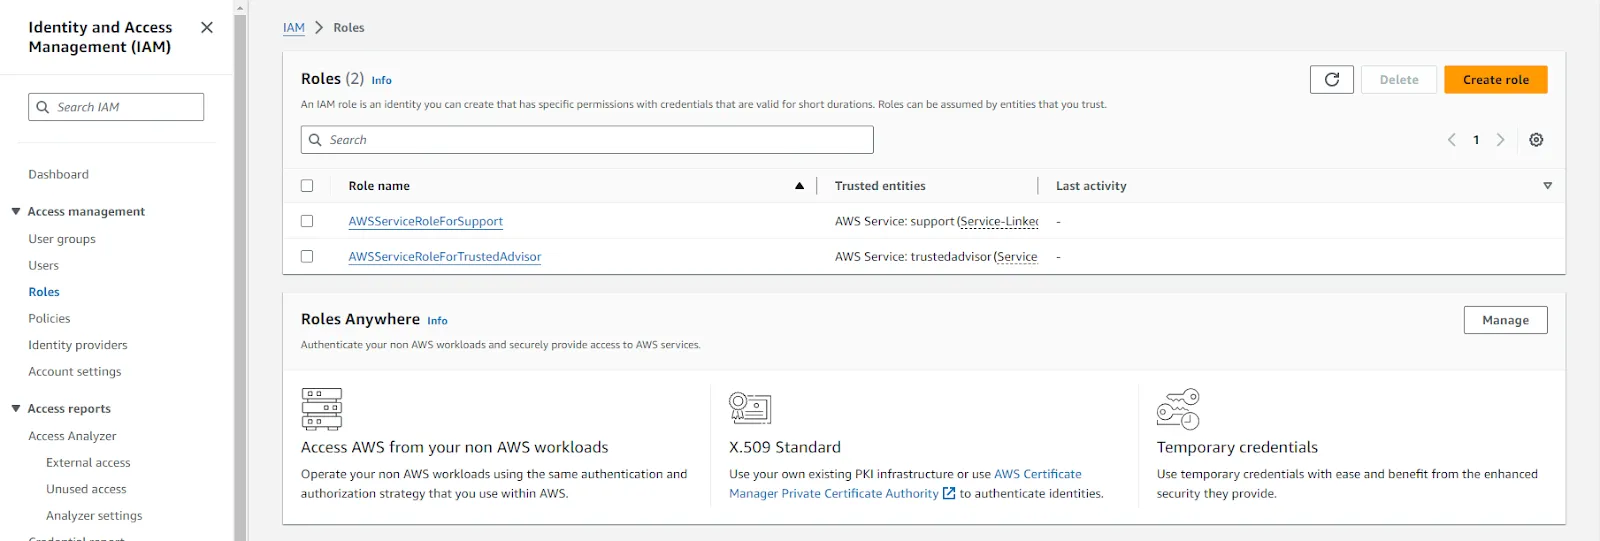
1. Go to IAM and select Roles.
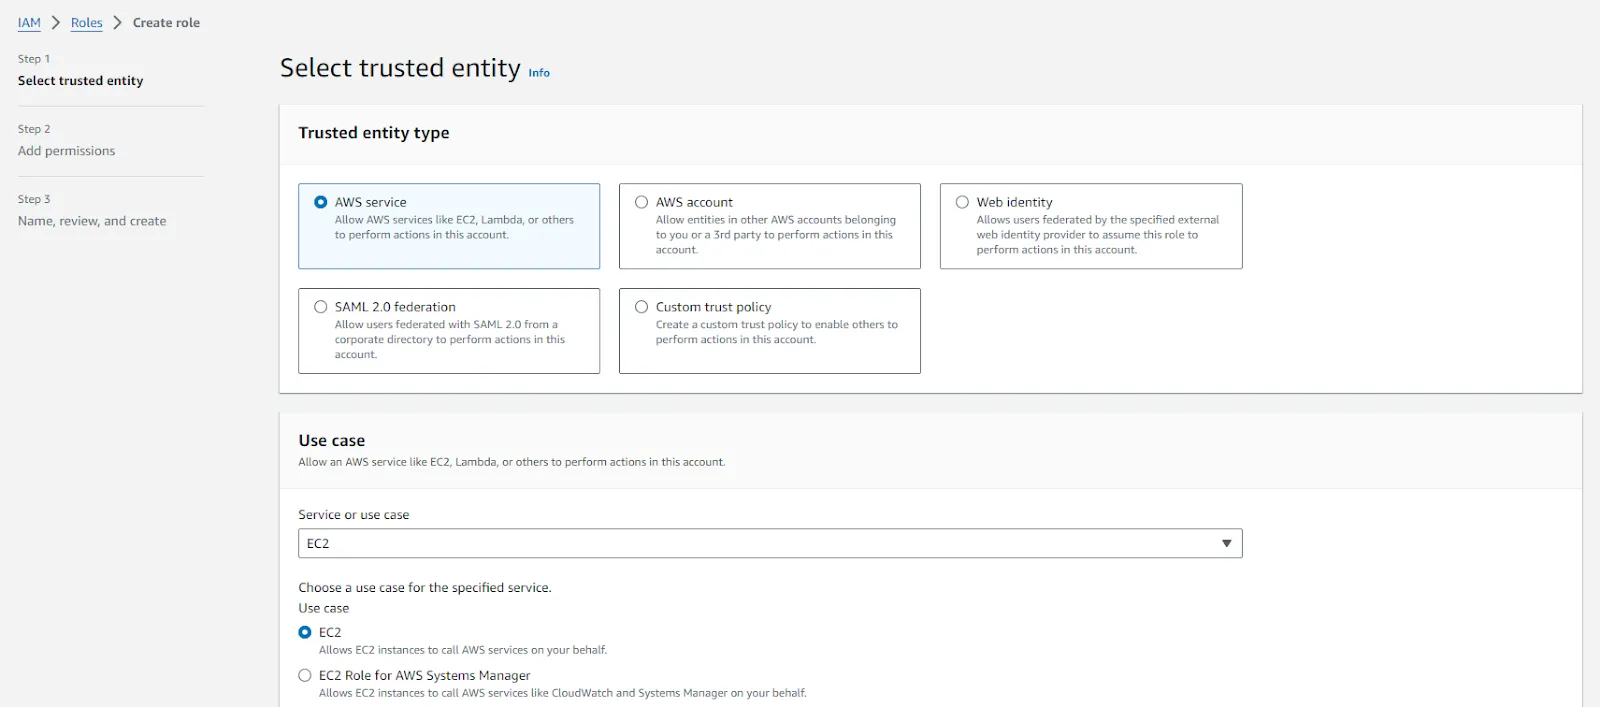
2. Click Create role and, in Trusted entity type, select AWS service and then choose EC2 for Use case.
3. Skip the next step and assign a name for the role. You can leave other settings unchanged.
4. Now, open the policy you created, go to Permissions, and click Create inline policy.
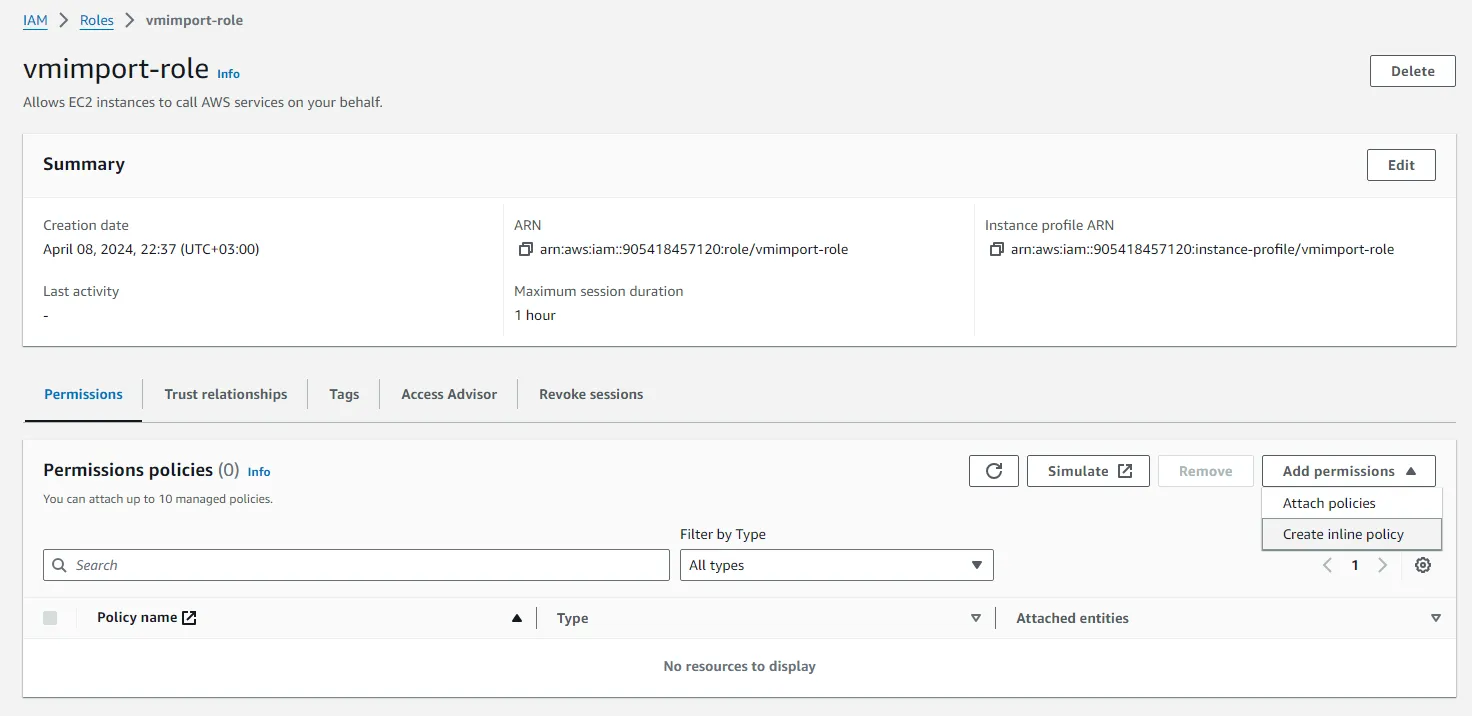
5. In the JSON editor, add the following:
{
   "Version":"2012-10-17",
   "Statement":[
      {
         "Effect":"Allow",
         "Action":[
            "s3:ListBucket",
            "s3:GetBucketLocation"
         ],
         "Resource":[
            "arn:aws:s3:::<your_s3bucket>"
         ]
      },
      {
         "Effect":"Allow",
         "Action":[
            "s3:GetObject"
         ],
         "Resource":[
            "arn:aws:s3:::<your_s3bucket>"/*"
         ]
      },
      {
         "Effect":"Allow",
         "Action":[
            "ec2:ModifySnapshotAttribute",
            "ec2:CopySnapshot",
            "ec2:RegisterImage",
            "ec2:Describe*"
         ],
         "Resource":"*"
      }
   ]
}
6. Make sure to specify correct name for the S3 bucket to host your AMI and then click Create Policy.
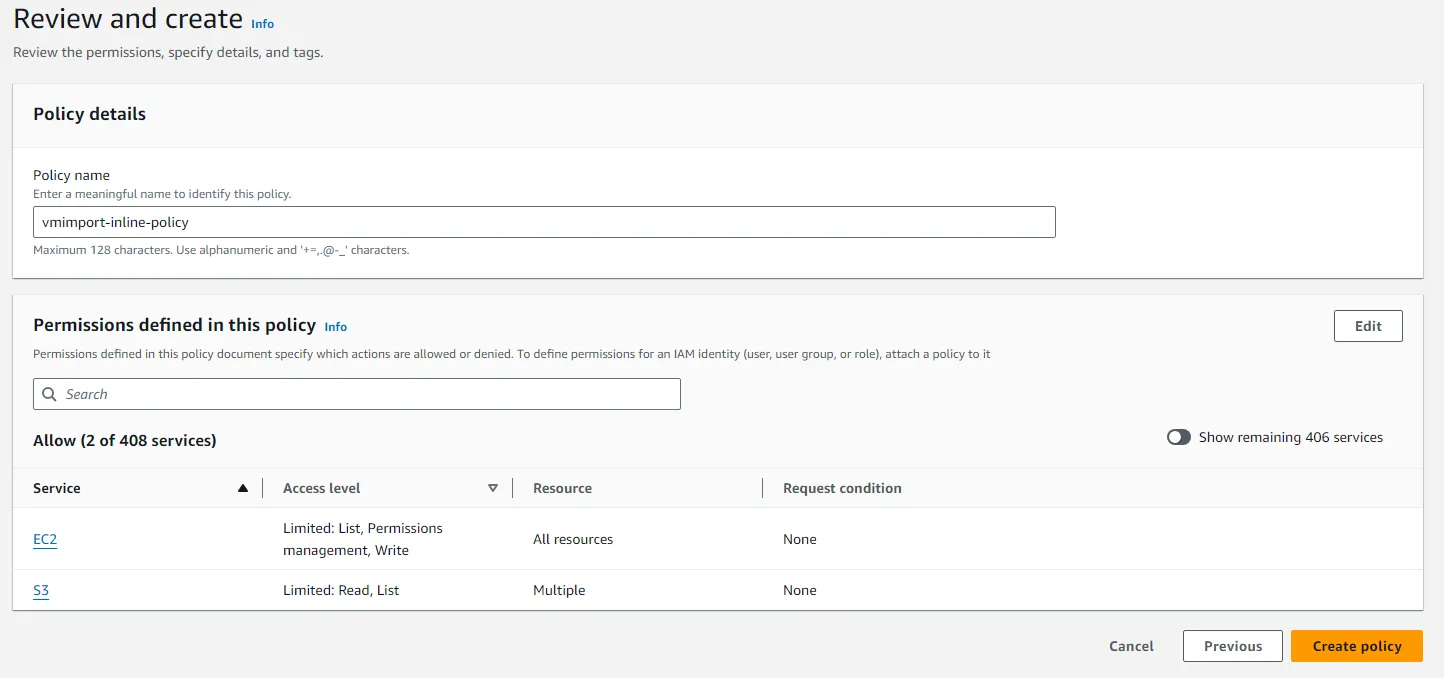
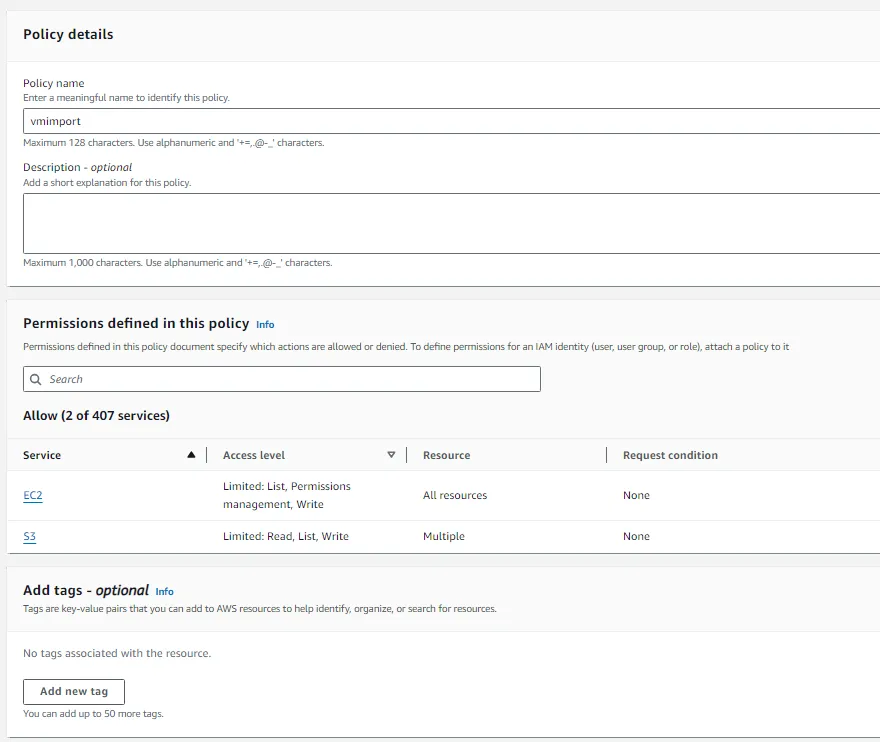
7. Create an access policy for AWS resources. Open Policies ⟶ Create Policy. Next, paste a JSON file named ‘vmimport.json’ with the following content:
{
  "Version": "2012-10-17",
  "Statement": [
    {
      "Effect": "Allow",
      "Action": [
        "s3:GetBucketLocation",
        "s3:GetObject",
        "s3:PutObject"
      ],
      "Resource": ["arn:aws:s3:::mys3bucket","arn:aws:s3:::mys3bucket/*"]
    },
    {
      "Effect": "Allow",
      "Action": [
        "ec2:CancelConversionTask",
        "ec2:CancelExportTask",
        "ec2:CreateImage",
        "ec2:CreateInstanceExportTask",
        "ec2:CreateTags",
        "ec2:DescribeConversionTasks",
        "ec2:DescribeExportTasks",
        "ec2:DescribeExportImageTasks",
        "ec2:DescribeImages",
        "ec2:DescribeInstanceStatus",
        "ec2:DescribeInstances",
        "ec2:DescribeSnapshots",
        "ec2:DescribeTags",
        "ec2:ExportImage",
        "ec2:ImportInstance",
        "ec2:ImportVolume",
        "ec2:StartInstances",
        "ec2:StopInstances",
        "ec2:TerminateInstances",
        "ec2:ImportImage",
        "ec2:ImportSnapshot",
        "ec2:DescribeImportImageTasks",
        "ec2:DescribeImportSnapshotTasks",
        "ec2:CancelImportTask"
      ],
      "Resource": "*"
    }
  ]
}
In the file, replace <your_s3bucket> with the name of your S3 bucket.
8. For Name*, enter ‘vmimport’, then click Create policy.
9. The next step is to attach the policy to the role. Open the role you created and go to Entities attached. Next, in Attach, select the role you created.

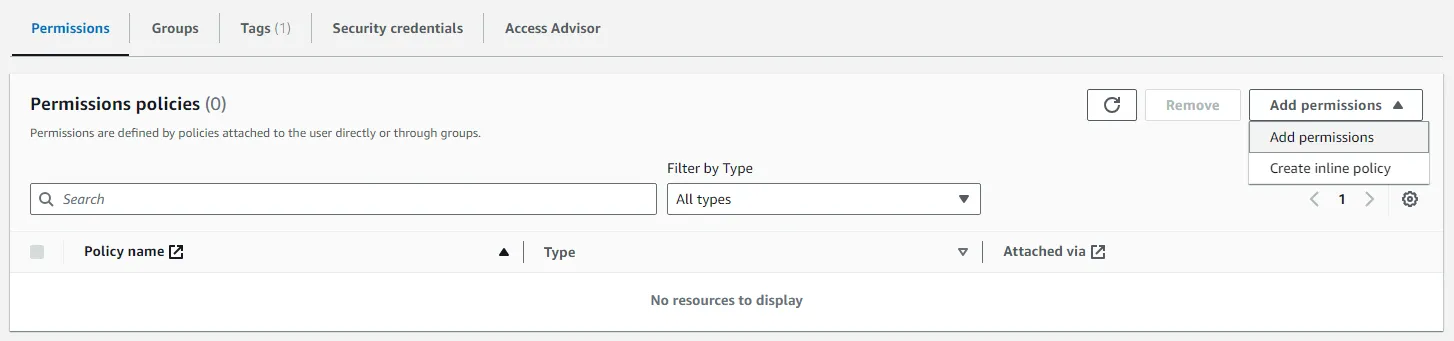
10. Add Policy to the user. Open Users ⟶ Your user ⟶ Permissions and click Add permissions.
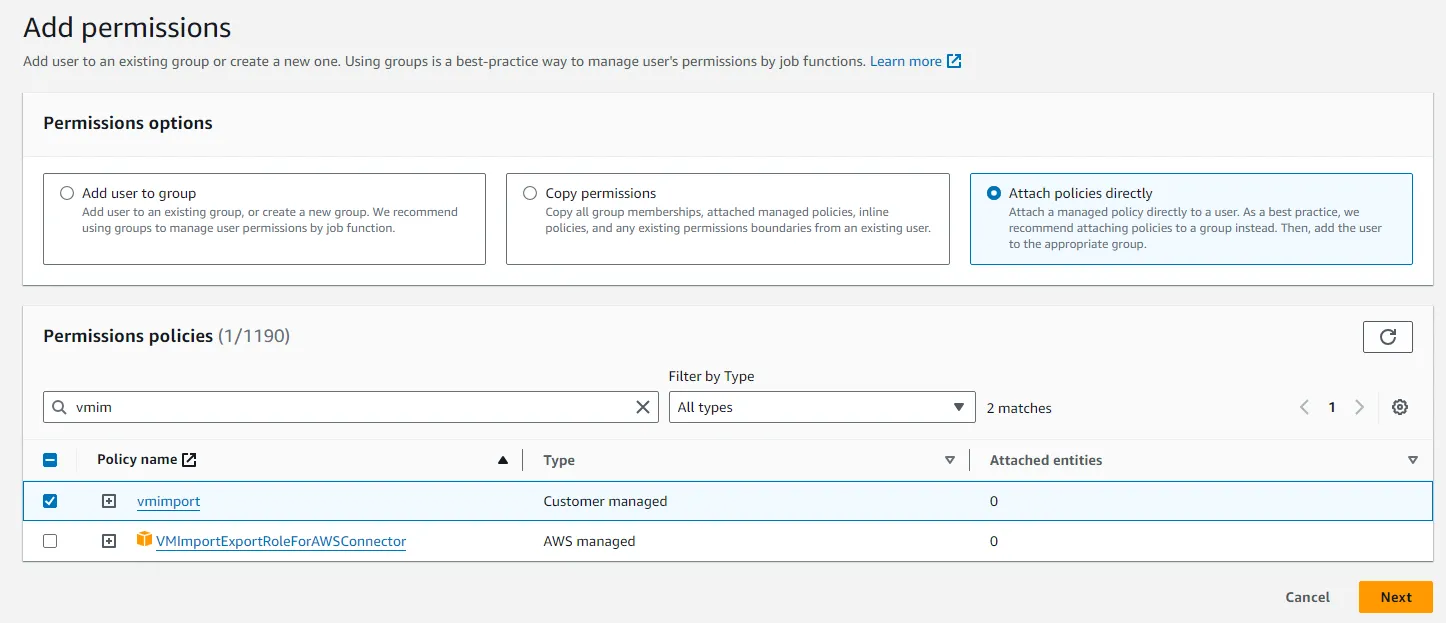
11. Click Attach policies directly and select the desired policy. Then click Add permissions.
Copying an Instance Image from EC2 AMI to S3 Bucket
You cannot just download an instance image from the AWS control panel. However, the console client of AWS CLI allows you to export the image to S3 storage. From there, you can download it, for example, to a local PC.
1. Install the AWS CLI on your local PC. Below, we describe the installation for Linux x86 64-bit. For Windows and macOS, read the official guide.
curl "https://awscli.amazonaws.com/awscli-exe-linux-x86_64.zip" -o "awscliv2.zip"
unzip awscliv2.zip
sudo ./aws/install
2. Check whether the installation is correct and configure the AWS CLI:
aws - version
aws-cli/2.15.36 Python/3.11.8 Linux/6.5.0–26-generic exe/x86_64.ubuntu.22 prompt/off
aws configure
AWS Access Key ID [None]: # your Key ID
AWS Secret Access Key [None]: # your Secret Access Key
Default region name [None]: # region where the instance is hosted
Default output format [None]: table # format of data output to the console
Example of a command to describe AWS instances:
aws ec2 describe-instances
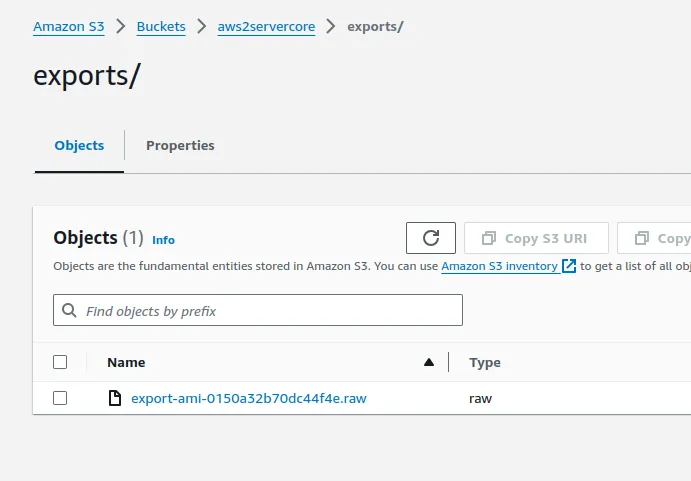
Convert the image and copy it to the S3 bucket:
aws ec2 export-image \
 - image-id ami-1234567890abcdef0 \
 - disk-image-format RAW \
 - s3-export-location S3Bucket=my-export-bucket,S3Prefix=exports/
Replace ‘ami-1234567890abcdef0’ with your image name. Note that ‘disk-image-format’ can be ‘VMDK’, ‘RAW’, or ‘VHD’. We recommend to select ‘RAW’.
Find out the task status:
aws ec2 describe-export-image-tasks --export-image-task-id export-ami-05eb5524acd01529f
Creating a Servercore Cloud Server
You can use your exported AWS image to create a cloud server in Servercore.
Uploading the Image
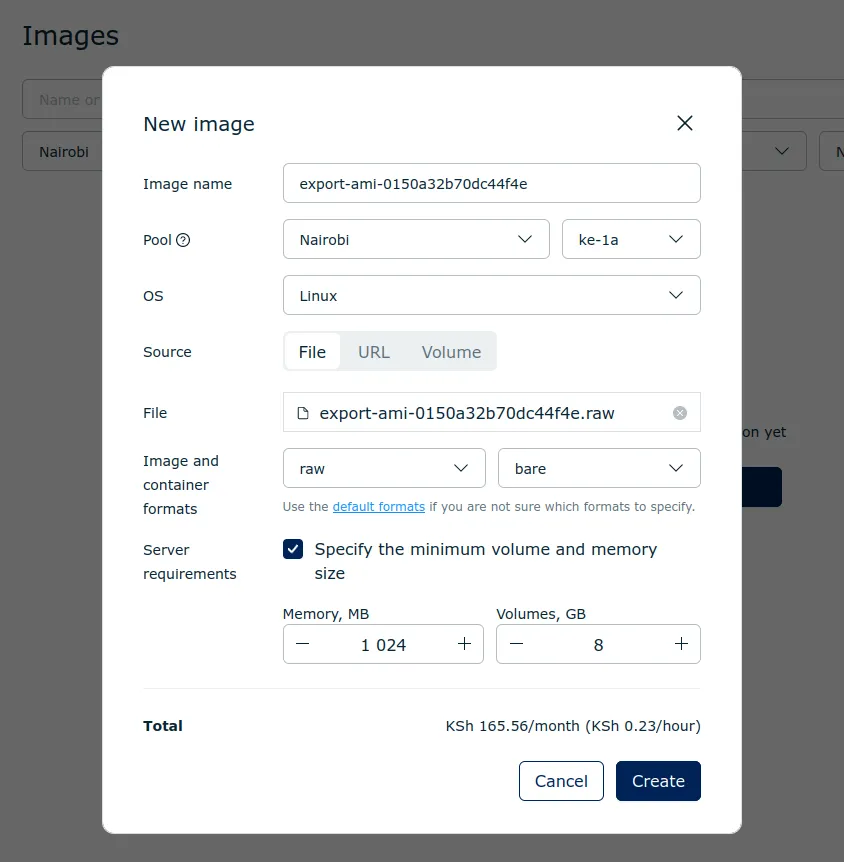
First, upload the image to the cloud platform. To do this, open the Servercore control panel and go to Cloud platform ⟶ Images. Create a new Image.
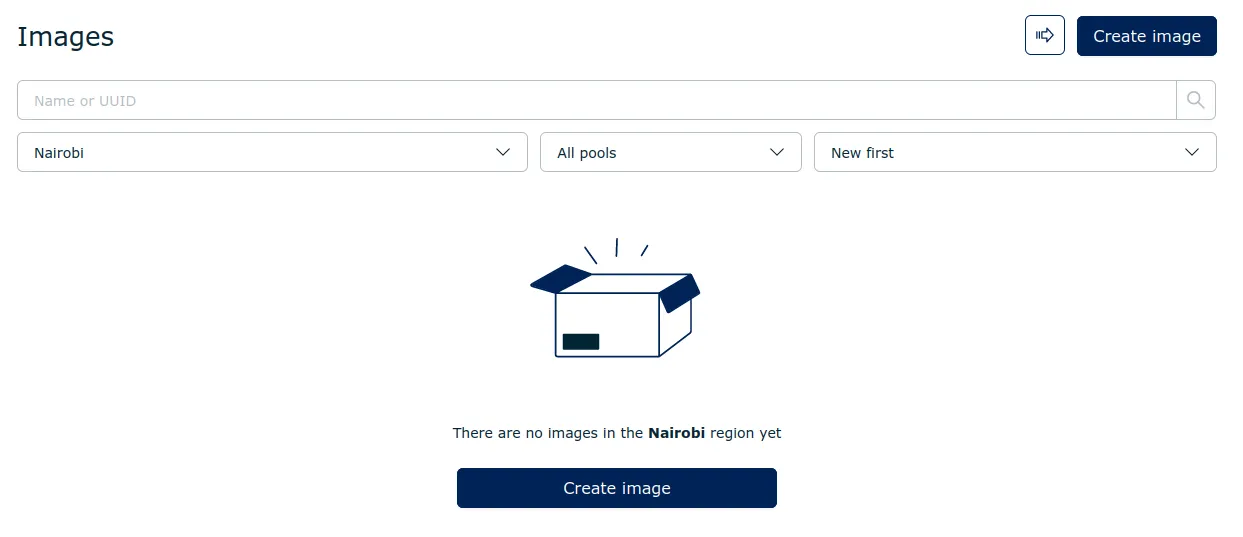
Open the Images section and click Create image. Choose File as the image source and upload the exported image from AWS.
Creating a Cloud Server
1. Open the Servers section and, once you selected the hosting location, click Create server.
2. Select the uploaded image in Choose another source ⟶ My images ⟶<your image>. Note that you can access only the sources within the selected availability zone.
3. When you select the network, add a public IP address (Public or Private + one public IP). Also, add an SSH key for accessing the cloud server.
4. After configuring the settings, click Create.
Configuring a Servercore Cloud Server
If the server is not configured automatically, you can do it manually.
1. Connect to the server via SSH using the public IP address and password from the control panel.
2. Open ‘/etc/hosts’ file, delete all AWS-related entries, and add a new hostname:
nano /etc/hosts
127.0.0.1 localhost hostname
3. Open ‘/etc/resolv.conf’ file and add DNS servers:
nano /etc/resolv.conf
nameserver 213.148.0.221
nameserver 213.148.0.222
4. Open the file with the list of repositories and delete all those related to AWS. Instead, add Servercore repositories:
sudo nano /etc/apt/sources.list
deb http://ke.mirror.servercore.com/ubuntu jammy main restricted
deb-src http://ke.mirror.servercore.com/ubuntu jammy main restricted
deb http://ke.mirror.servercore.com/ubuntu jammy-updates main restricted
deb-src http://ke.mirror.servercore.com/ubuntu jammy-updates main restricted
deb http://ke.mirror.servercore.com/ubuntu jammy universe
deb-src http://ke.mirror.servercore.com/ubuntu jammy universe
deb http://ke.mirror.servercore.com/ubuntu jammy-updates universe
deb-src http://ke.mirror.servercore.com/ubuntu jammy-updates universe
deb http://ke.mirror.servercore.com/ubuntu jammy multiverse
deb-src http://ke.mirror.servercore.com/ubuntu jammy multiverse
deb http://ke.mirror.servercore.com/ubuntu jammy-updates multiverse
deb-src http://ke.mirror.servercore.com/ubuntu jammy-updates multiverse
deb http://ke.mirror.servercore.com/ubuntu jammy-backports main restricted universe multiverse
deb-src http://ke.mirror.servercore.com/ubuntu jammy-backports main restricted universe multiverse
deb http://security.ubuntu.com/ubuntu jammy-security main restricted
deb-src http://security.ubuntu.com/ubuntu jammy-security main restricted
deb http://security.ubuntu.com/ubuntu jammy-security universe
deb-src http://security.ubuntu.com/ubuntu jammy-security universe
deb http://security.ubuntu.com/ubuntu jammy-security multiverse
deb-src http://security.ubuntu.com/ubuntu jammy-security multiverse
deb [arch=all signed-by=/usr/share/keyrings/openstack.gpg] https://ke.mirror.servercore.com/3rd-party/cloud-init-deb/jammy/ jammy main
5. The final step is to reboot the server:
sudo reboot
It’s done — all changes became effective and you can use the server.
Conclusion
We discussed how to migrate from AWS to Servercore by creating an AWS instance image, moving it to the S3 bucket, and then using it to create a cloud server. If you have any questions, drop them in the comments!